
Tips
0 Mins Read
How to Import Figma to Framer: Complete Step-by-Step Guide
A complete step-by-step guide to importing your Figma design into Framer using the official plugin. Covers the full process, common issues, fixes, and tips for a smooth import.
By

Widya Bayu W
Share

So, you made something cool in Figma and now you're like, "Okay, how do I turn this into a real website?" I totally get it. I had that same moment too.
In this guide, I'll walk you through how to import your design from Figma into Framer using the official Figma to Framer plugin. It's a super simple process, even if you're new to both tools.
We'll start with the basics, then I'll show you what to do after the import. Because let's be real, it's not all perfect right away. That's the part most people forget to do.
Let's jump in.
What you'll need
Before we start, here's what you need to have ready:
A Figma file you want to turn into a website
A Framer account
A little time to clean things up after importing
How to Import from Figma to Framer
If you prefer a video explanation on how to do it, Framer has a video you can follow.
But if you prefer a step-by-step tutorial with screenshots, feel free to follow this one.
1. Open your Figma file
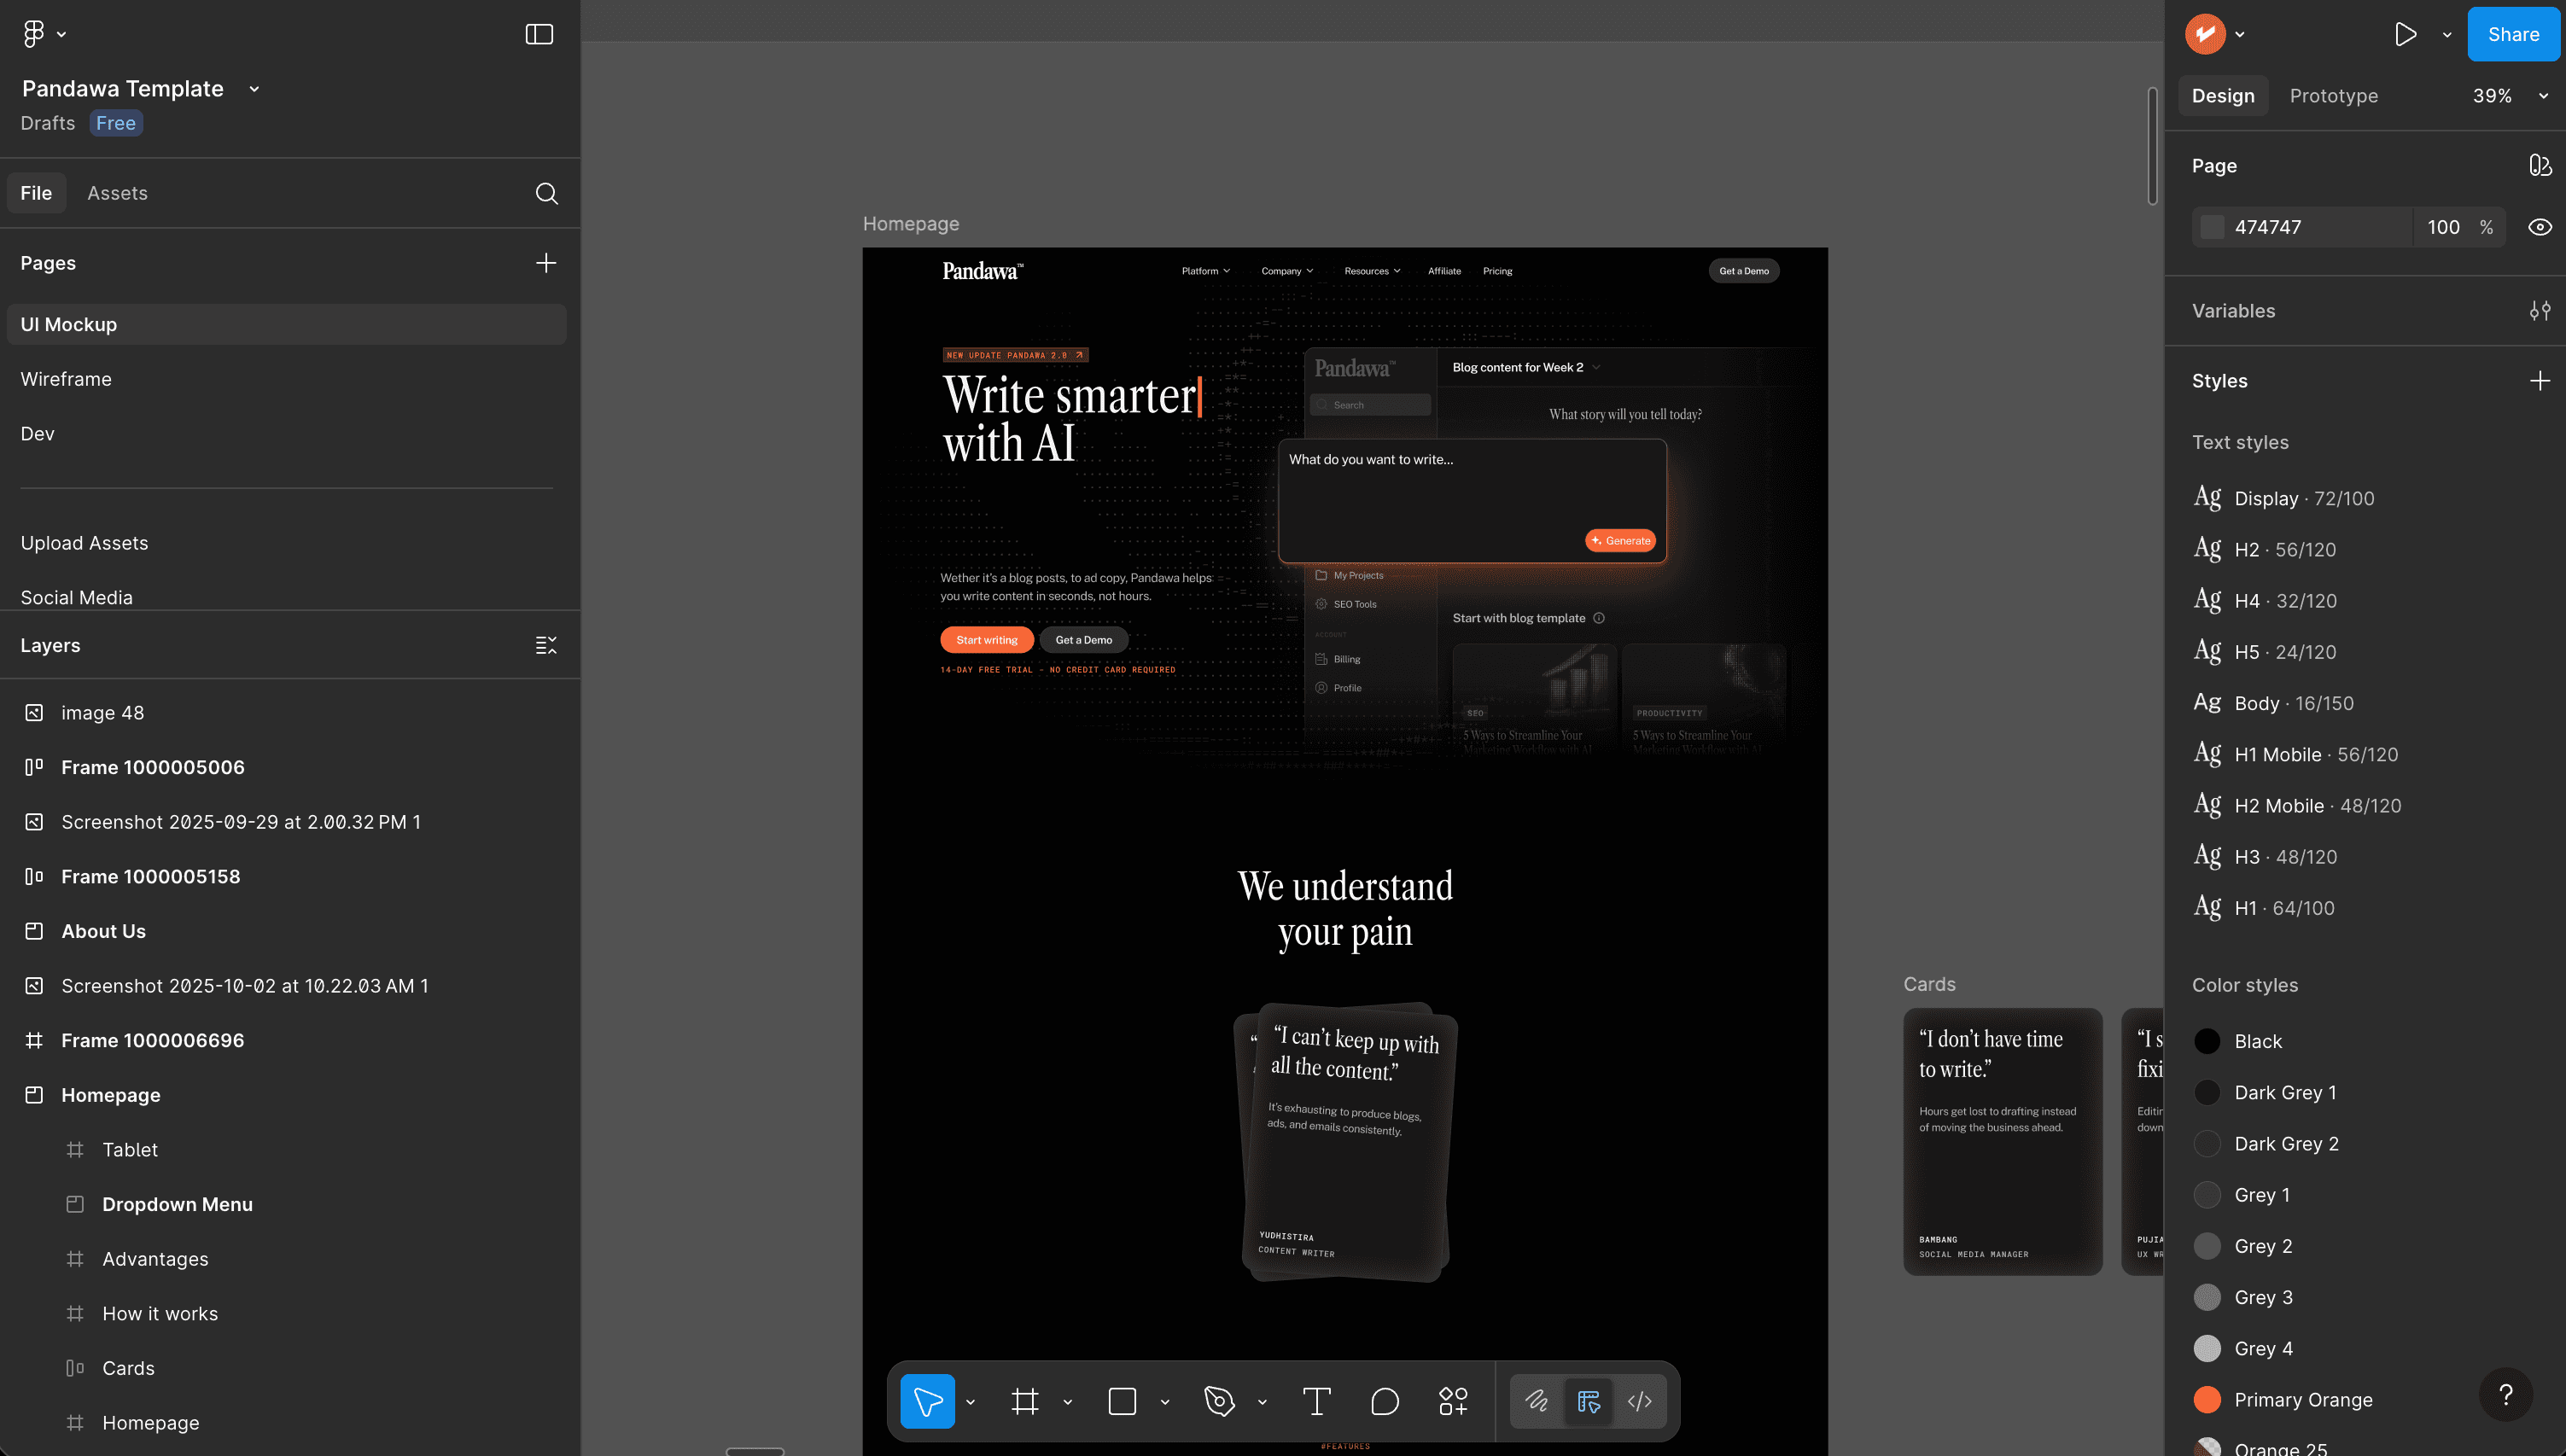
Start by opening the Figma design you want to bring into Framer. It can be a full site, just a landing page, or even a tiny section.
2. Install the plugin
If you haven't already, go to Figma to Framer plugin and install it.
Or do it straight from Figma:
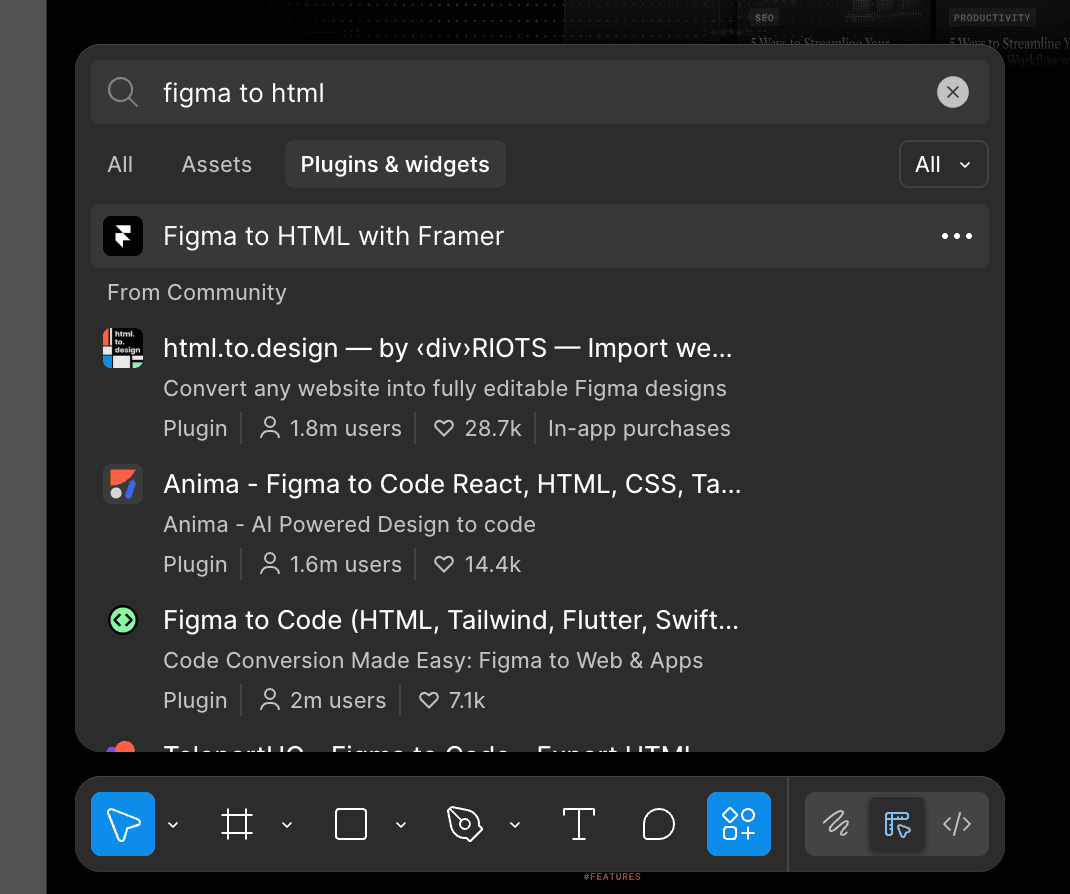
Press Command + K on Mac or Control + K on Windows
Choose Plugins and Widgets
Search for Figma to HTML with Framer
Click Run or Install
3. Select what you want to export
In your Figma file, select the frames or sections you want to move into Framer. You don't have to move the entire design at once.
I highly suggest importing one section at a time.
Sometimes, when you try to copy everything at once, things don't paste correctly or parts get messed up in Framer. Doing it section by section gives you more control and helps you spot issues earlier.
Tip: Using Auto Layout in Figma helps a lot. It makes things behave better when you bring them into Framer.
Don't be like me, I didn't use auto layout :)
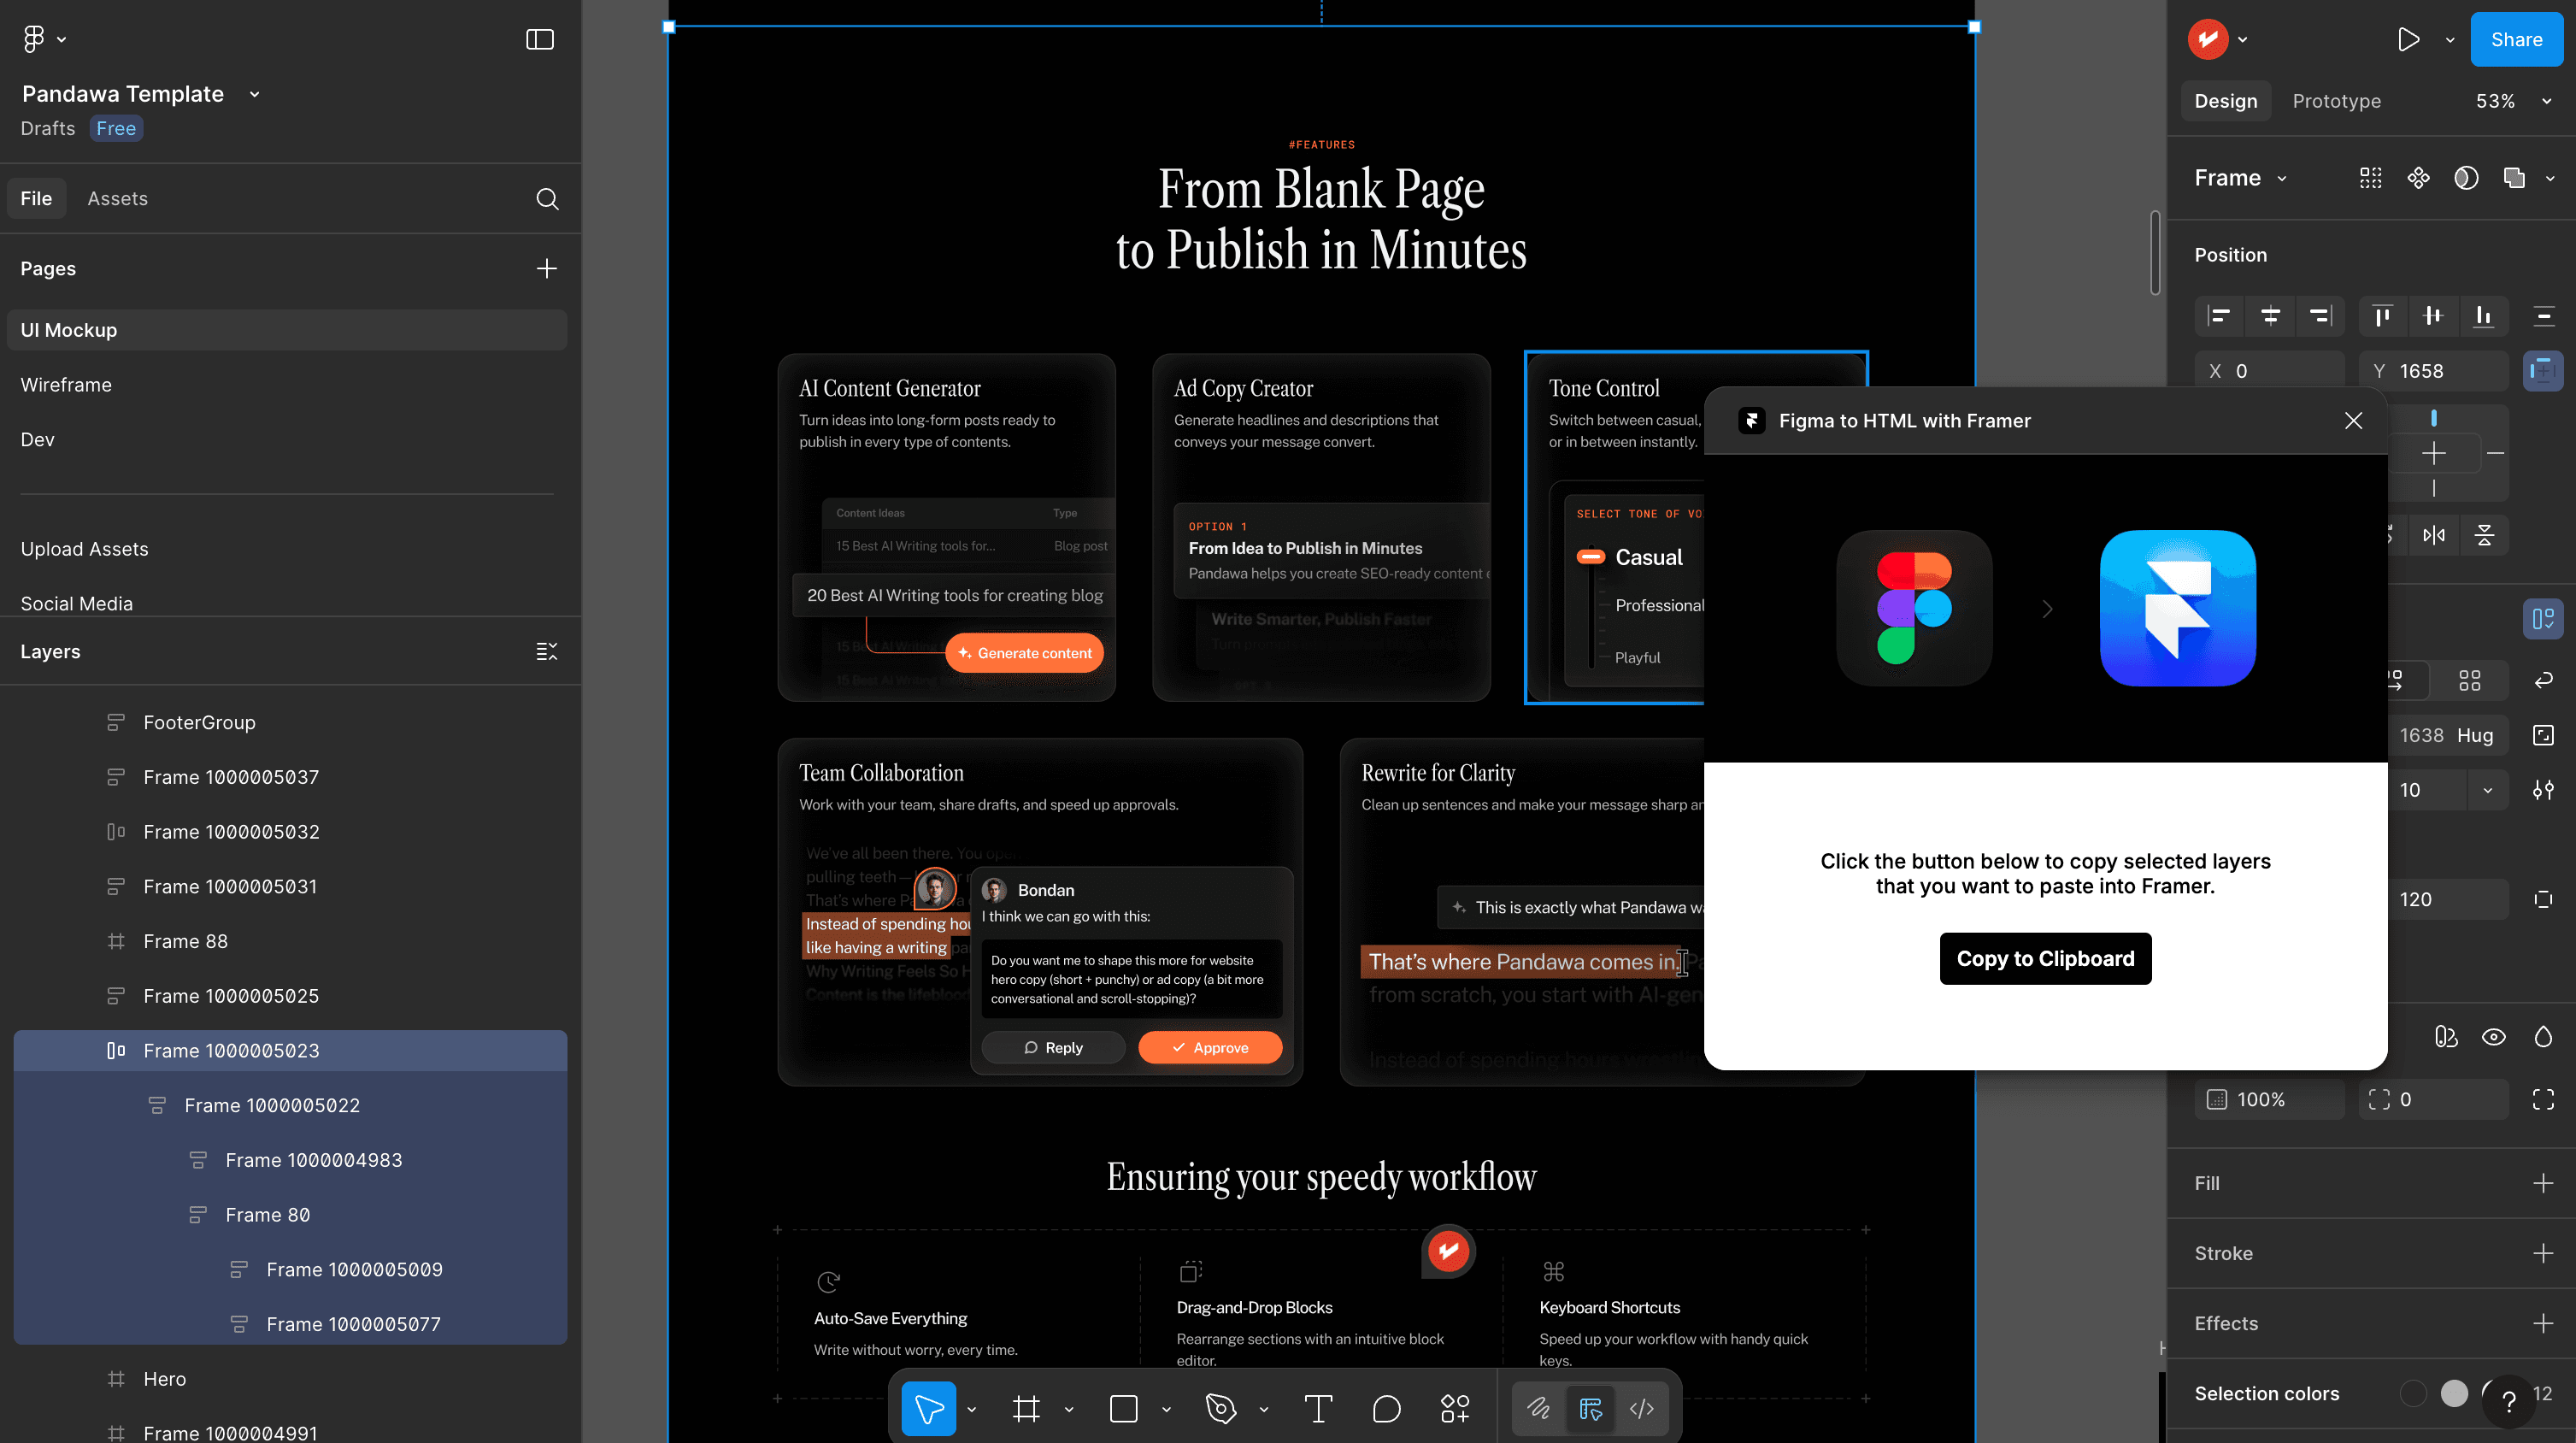
4. Click copy to clipboard
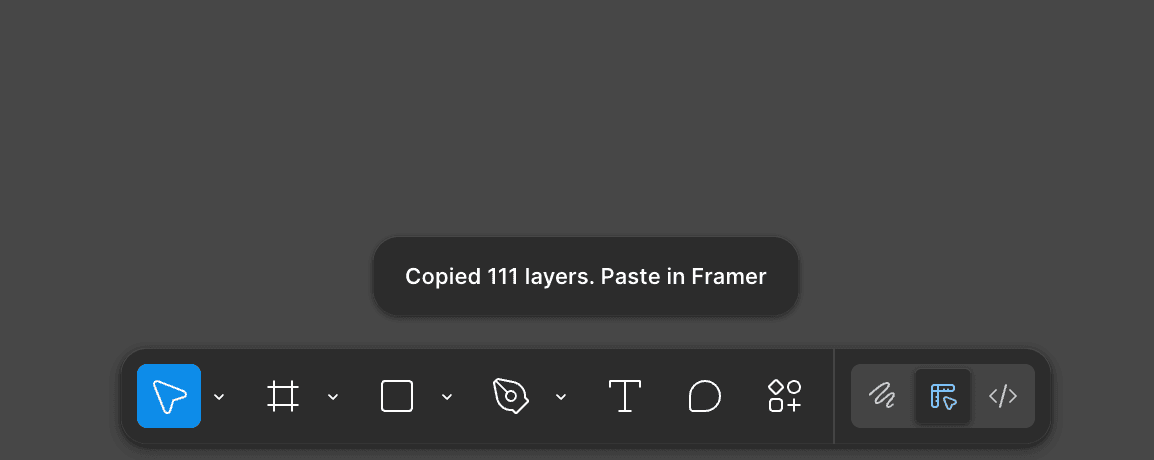
Press the Copy to clipboard button. It will copy everything you selected and get it ready for pasting.
5. Head to Framer and paste
Now go to Framer, open a new project, and just hit Paste on the canvas.
P.s. please ignore my layer naming :)
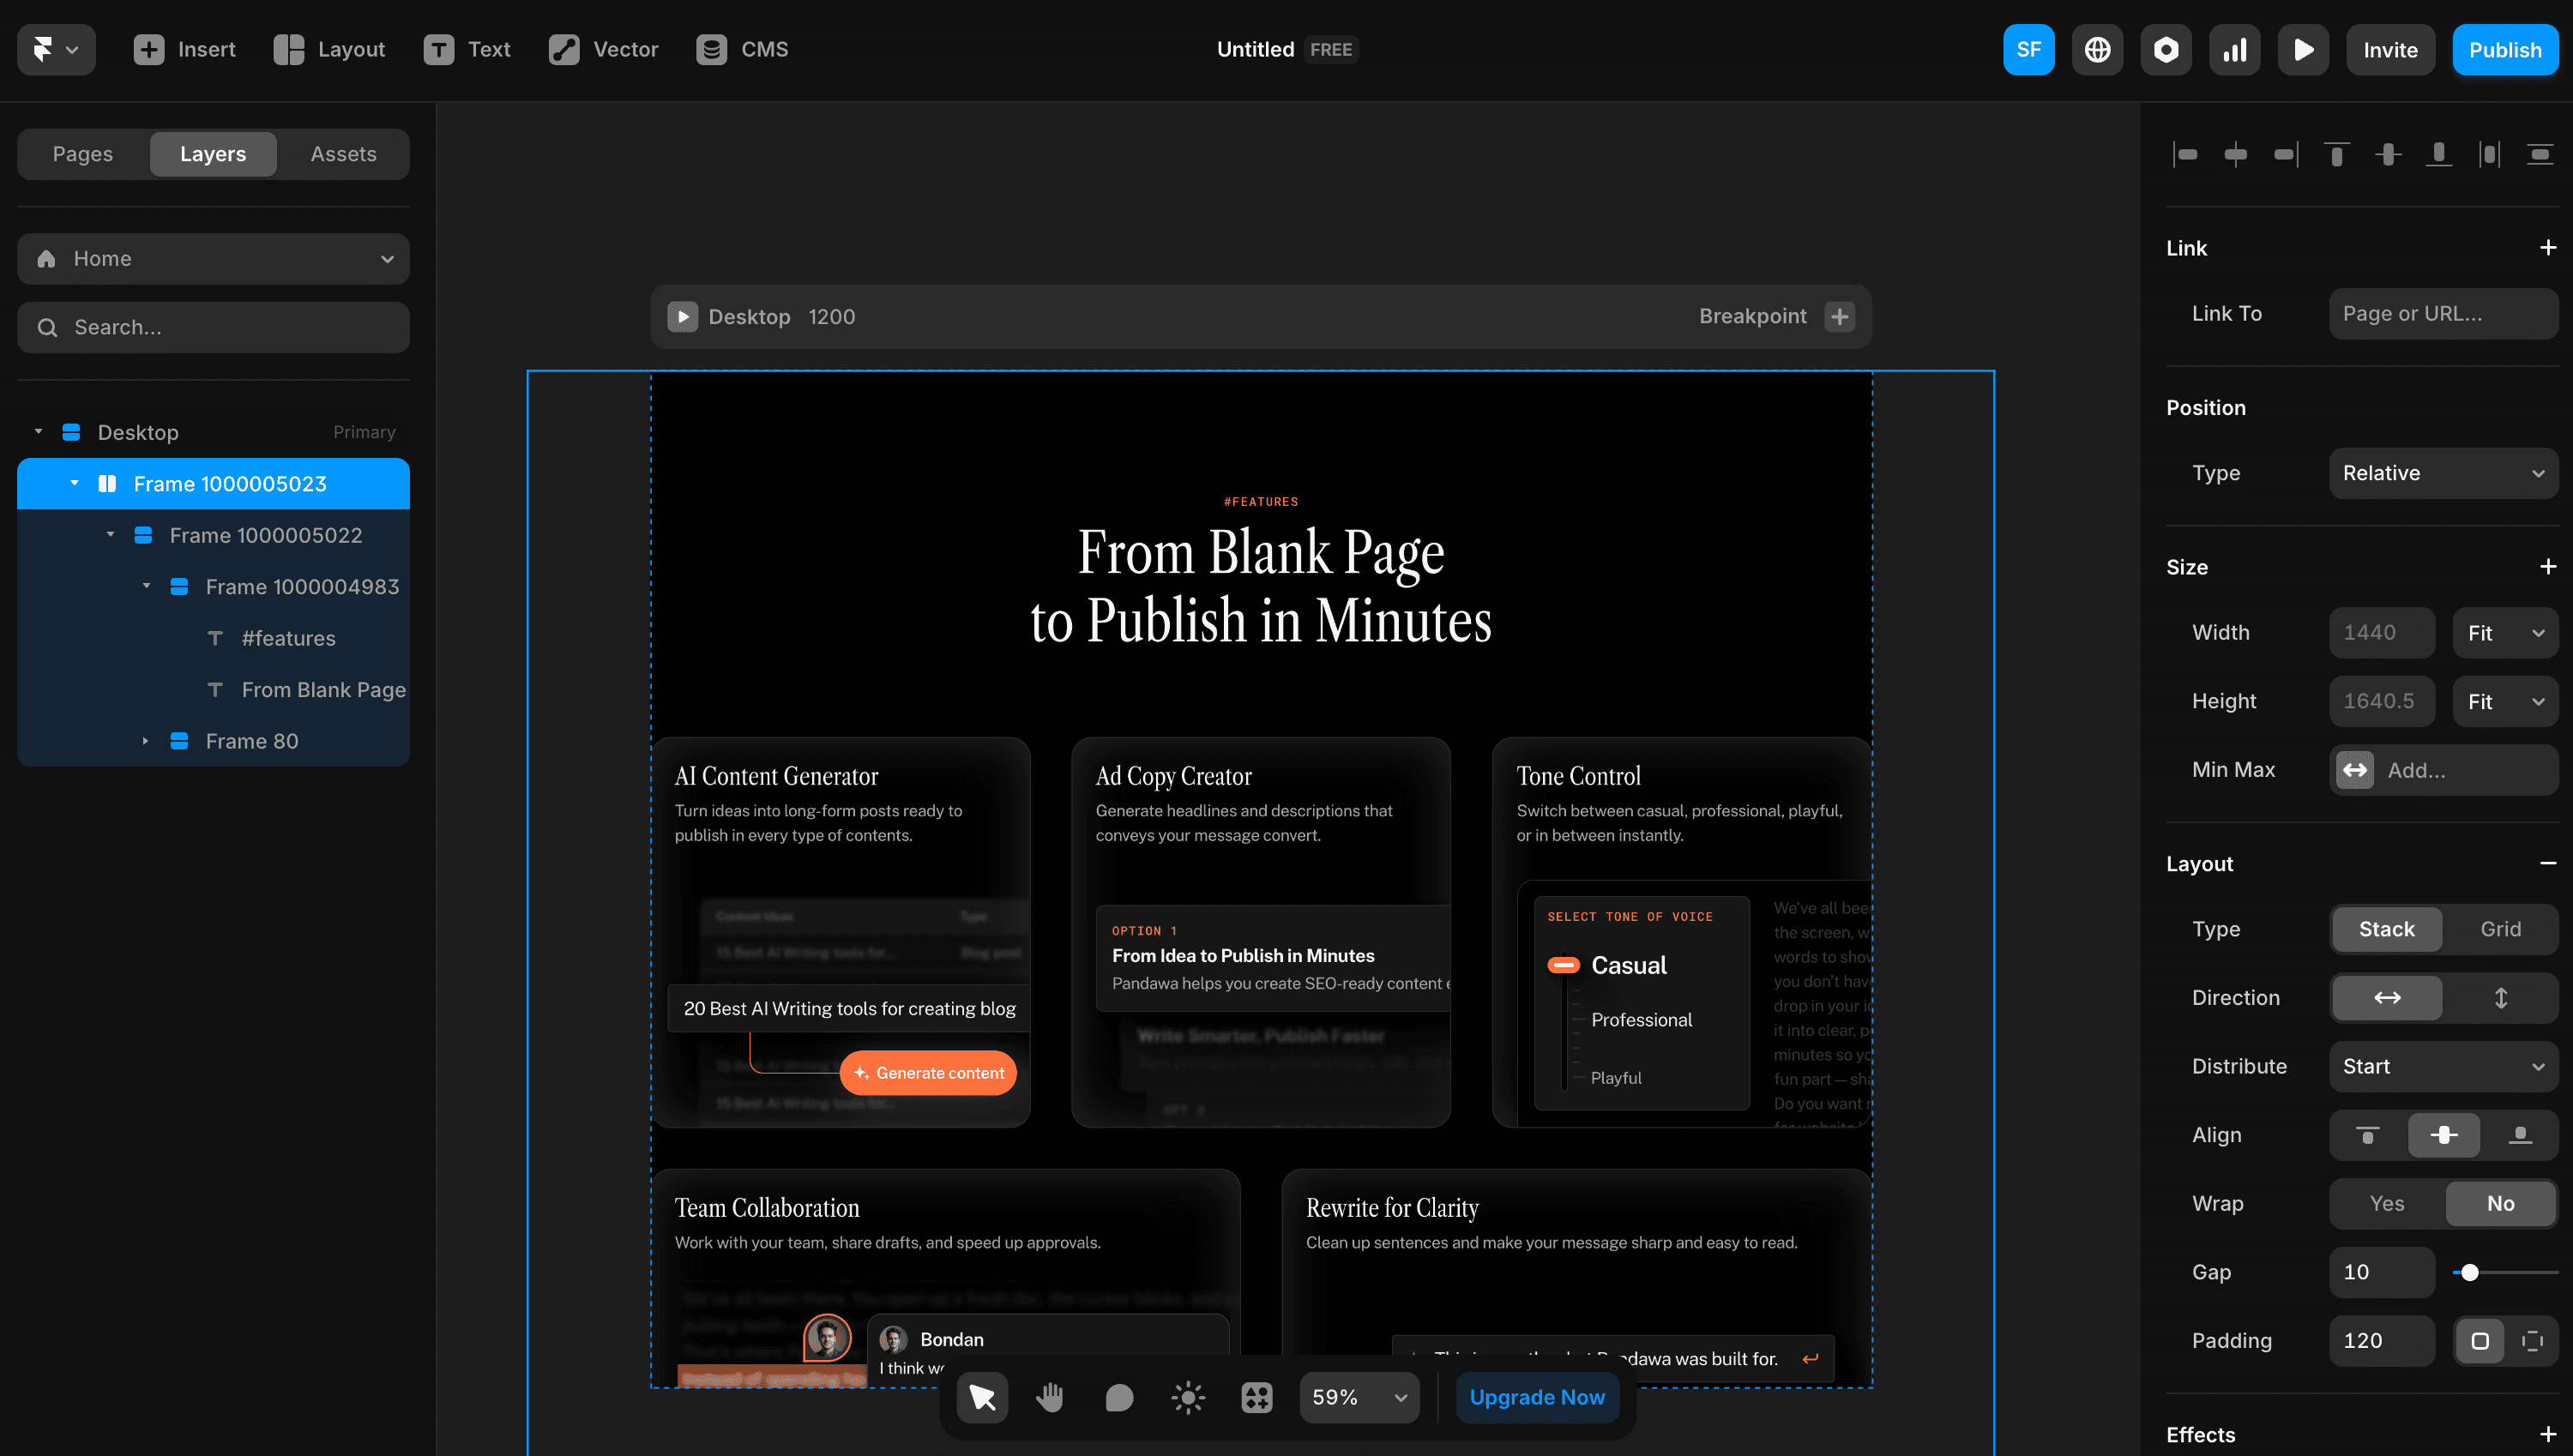
6. Adjust it
After pasting your design into Framer, it might look messed up, that's the part where you need to adjust it. If you don't use Auto Layout like I do, it might need a couple of adjustments. But if you already use Auto Layout, it will be easier for you to adjust.
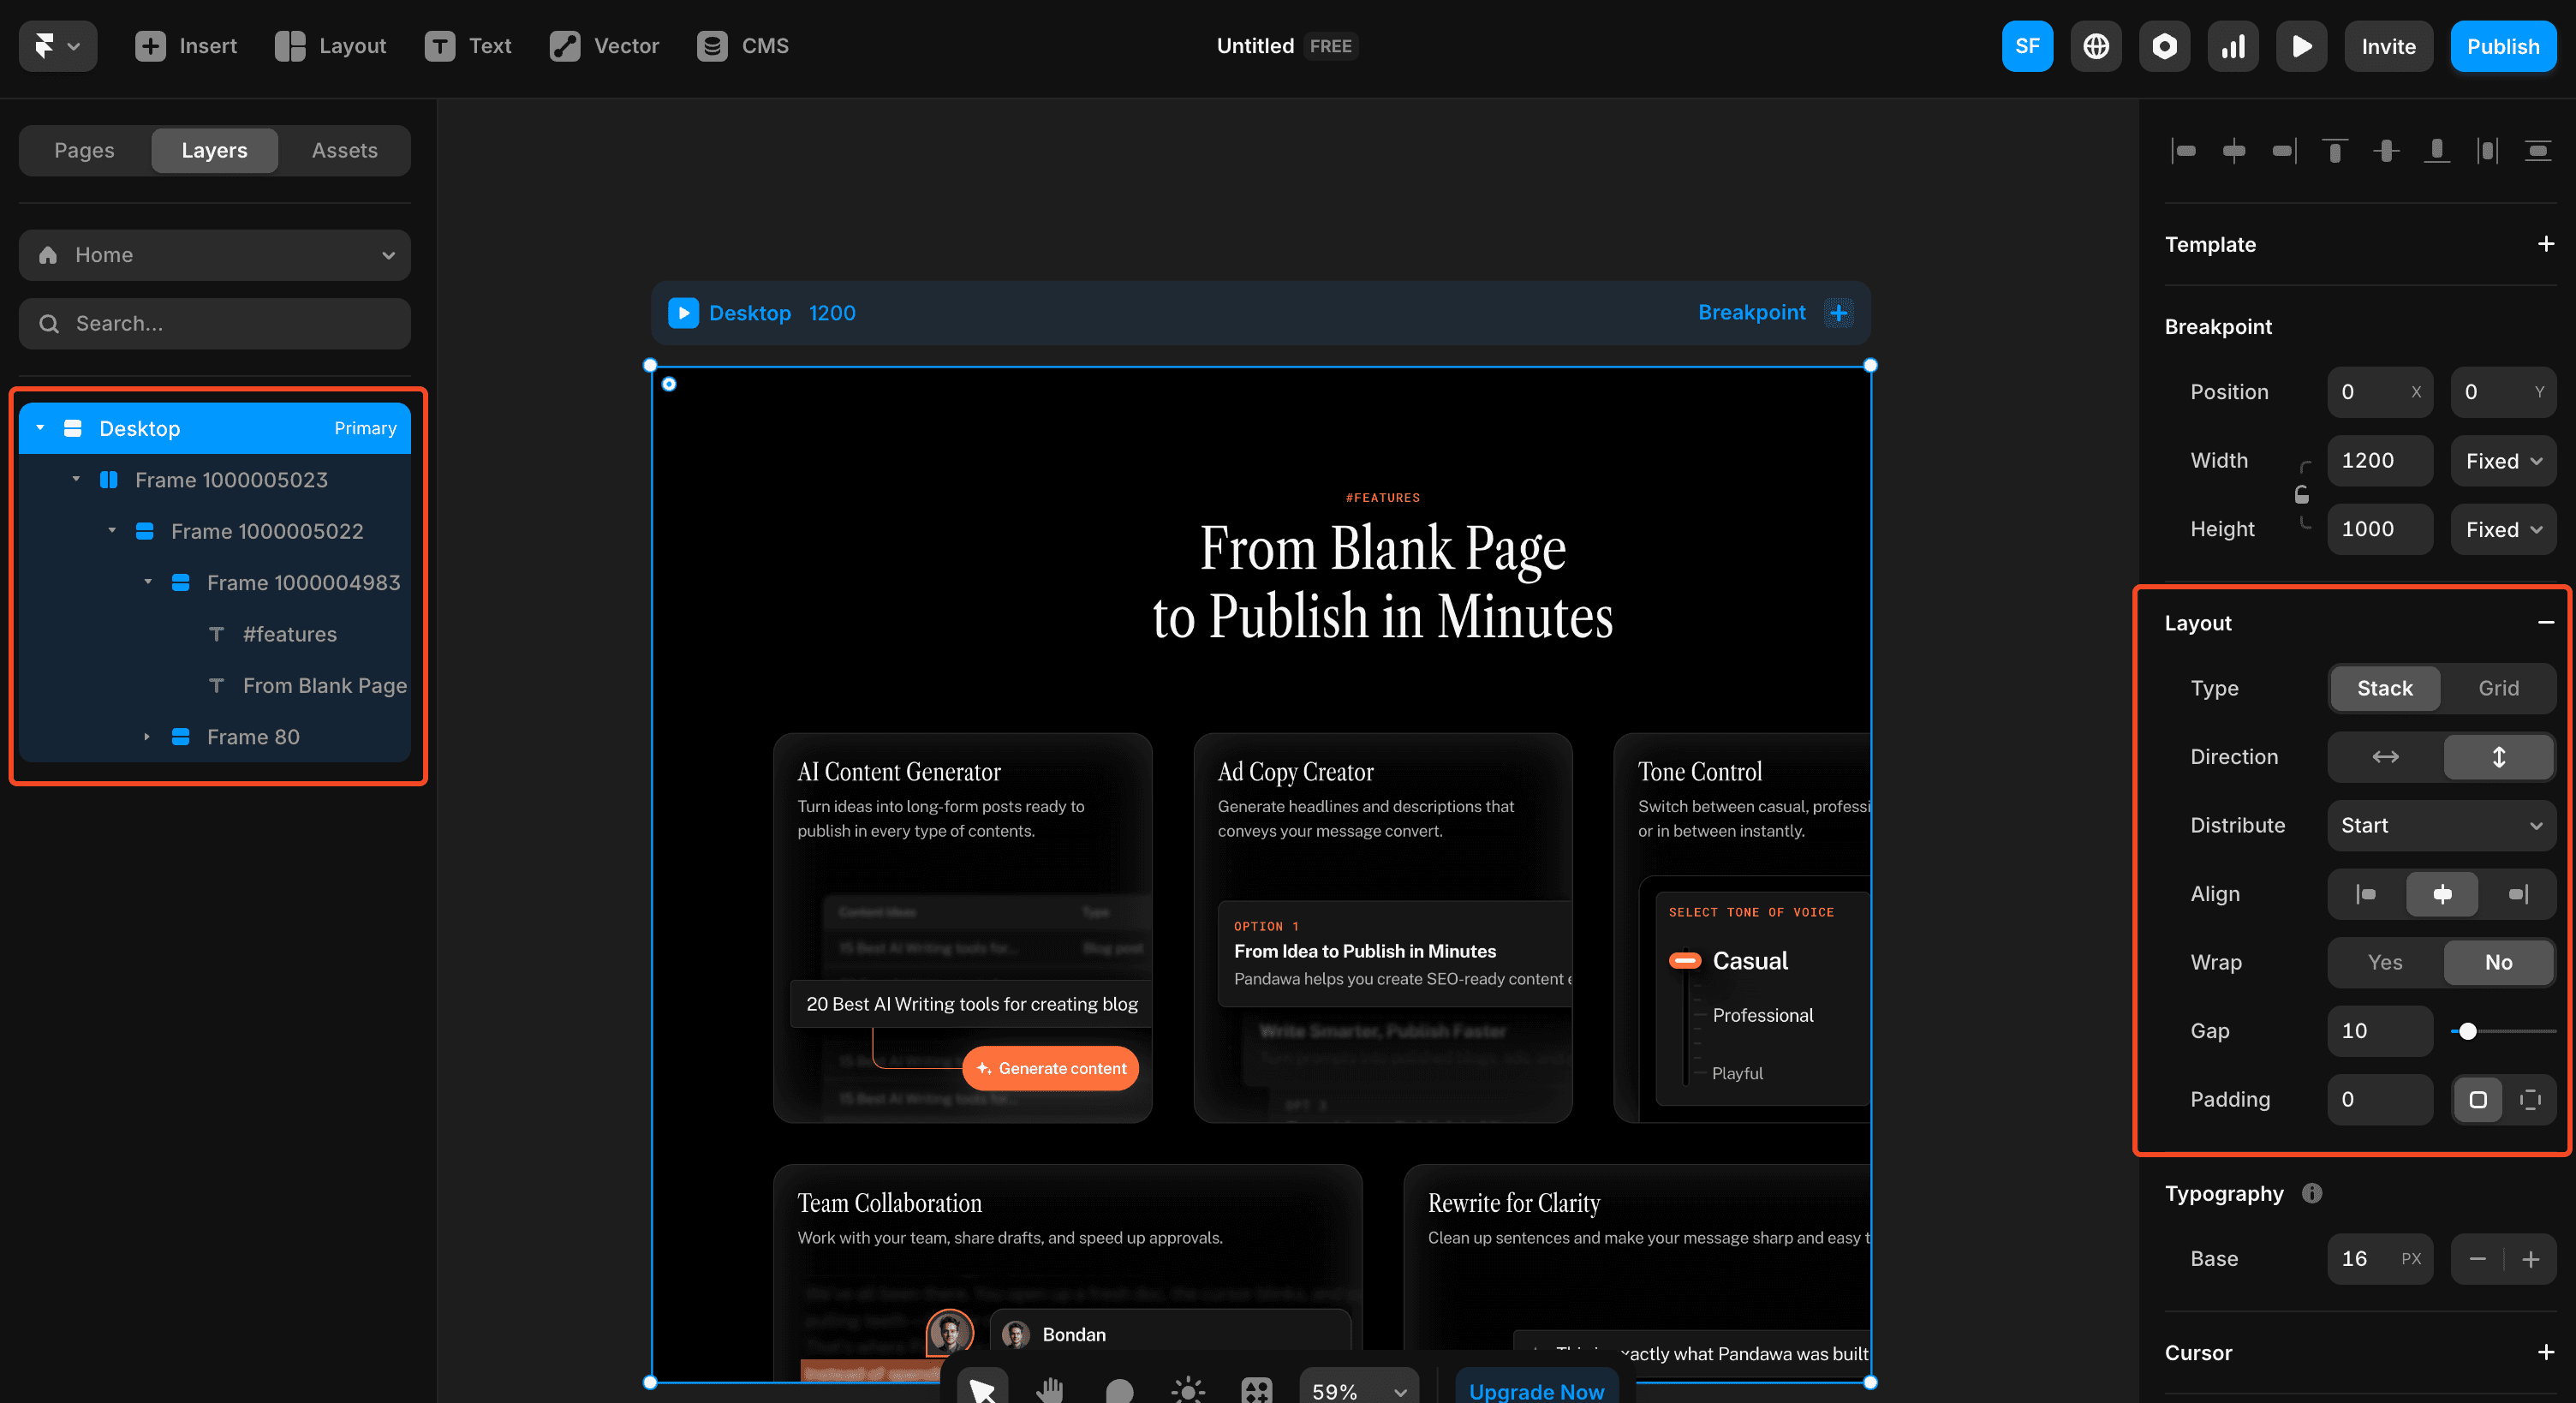
In this case, the first thing you should do is always use layout on your Framer canvas and set the canvas height to fit.
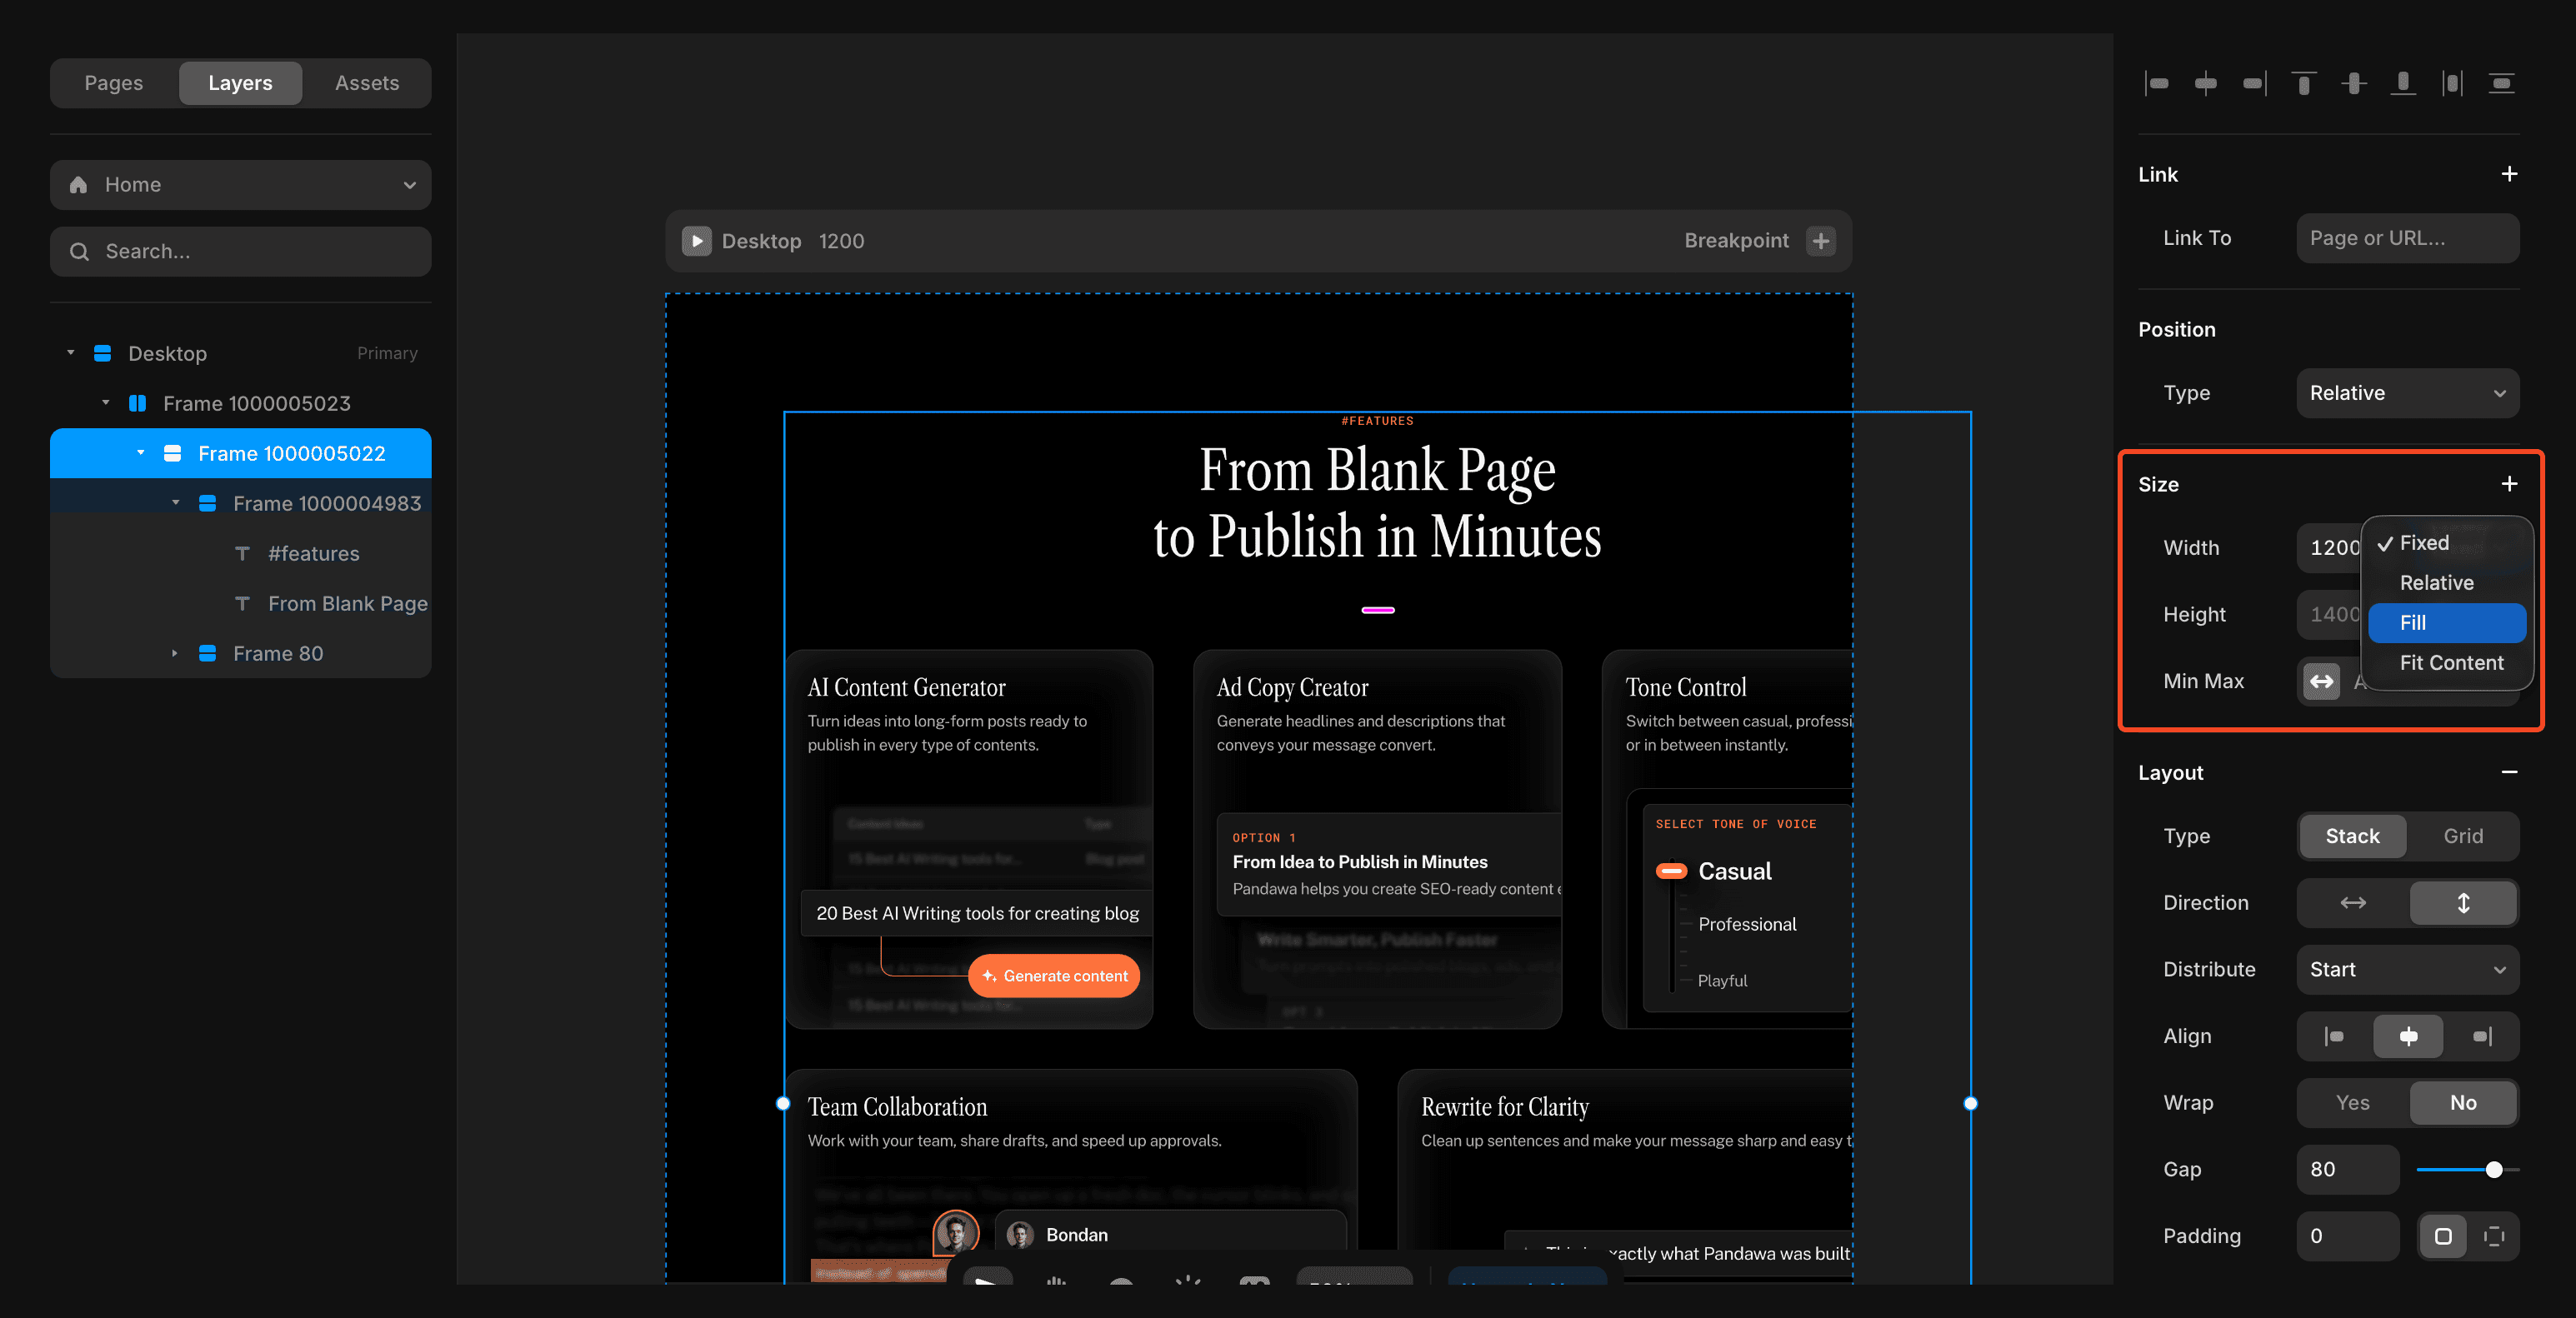
Then, make sure to set all the fixed widths to fill.
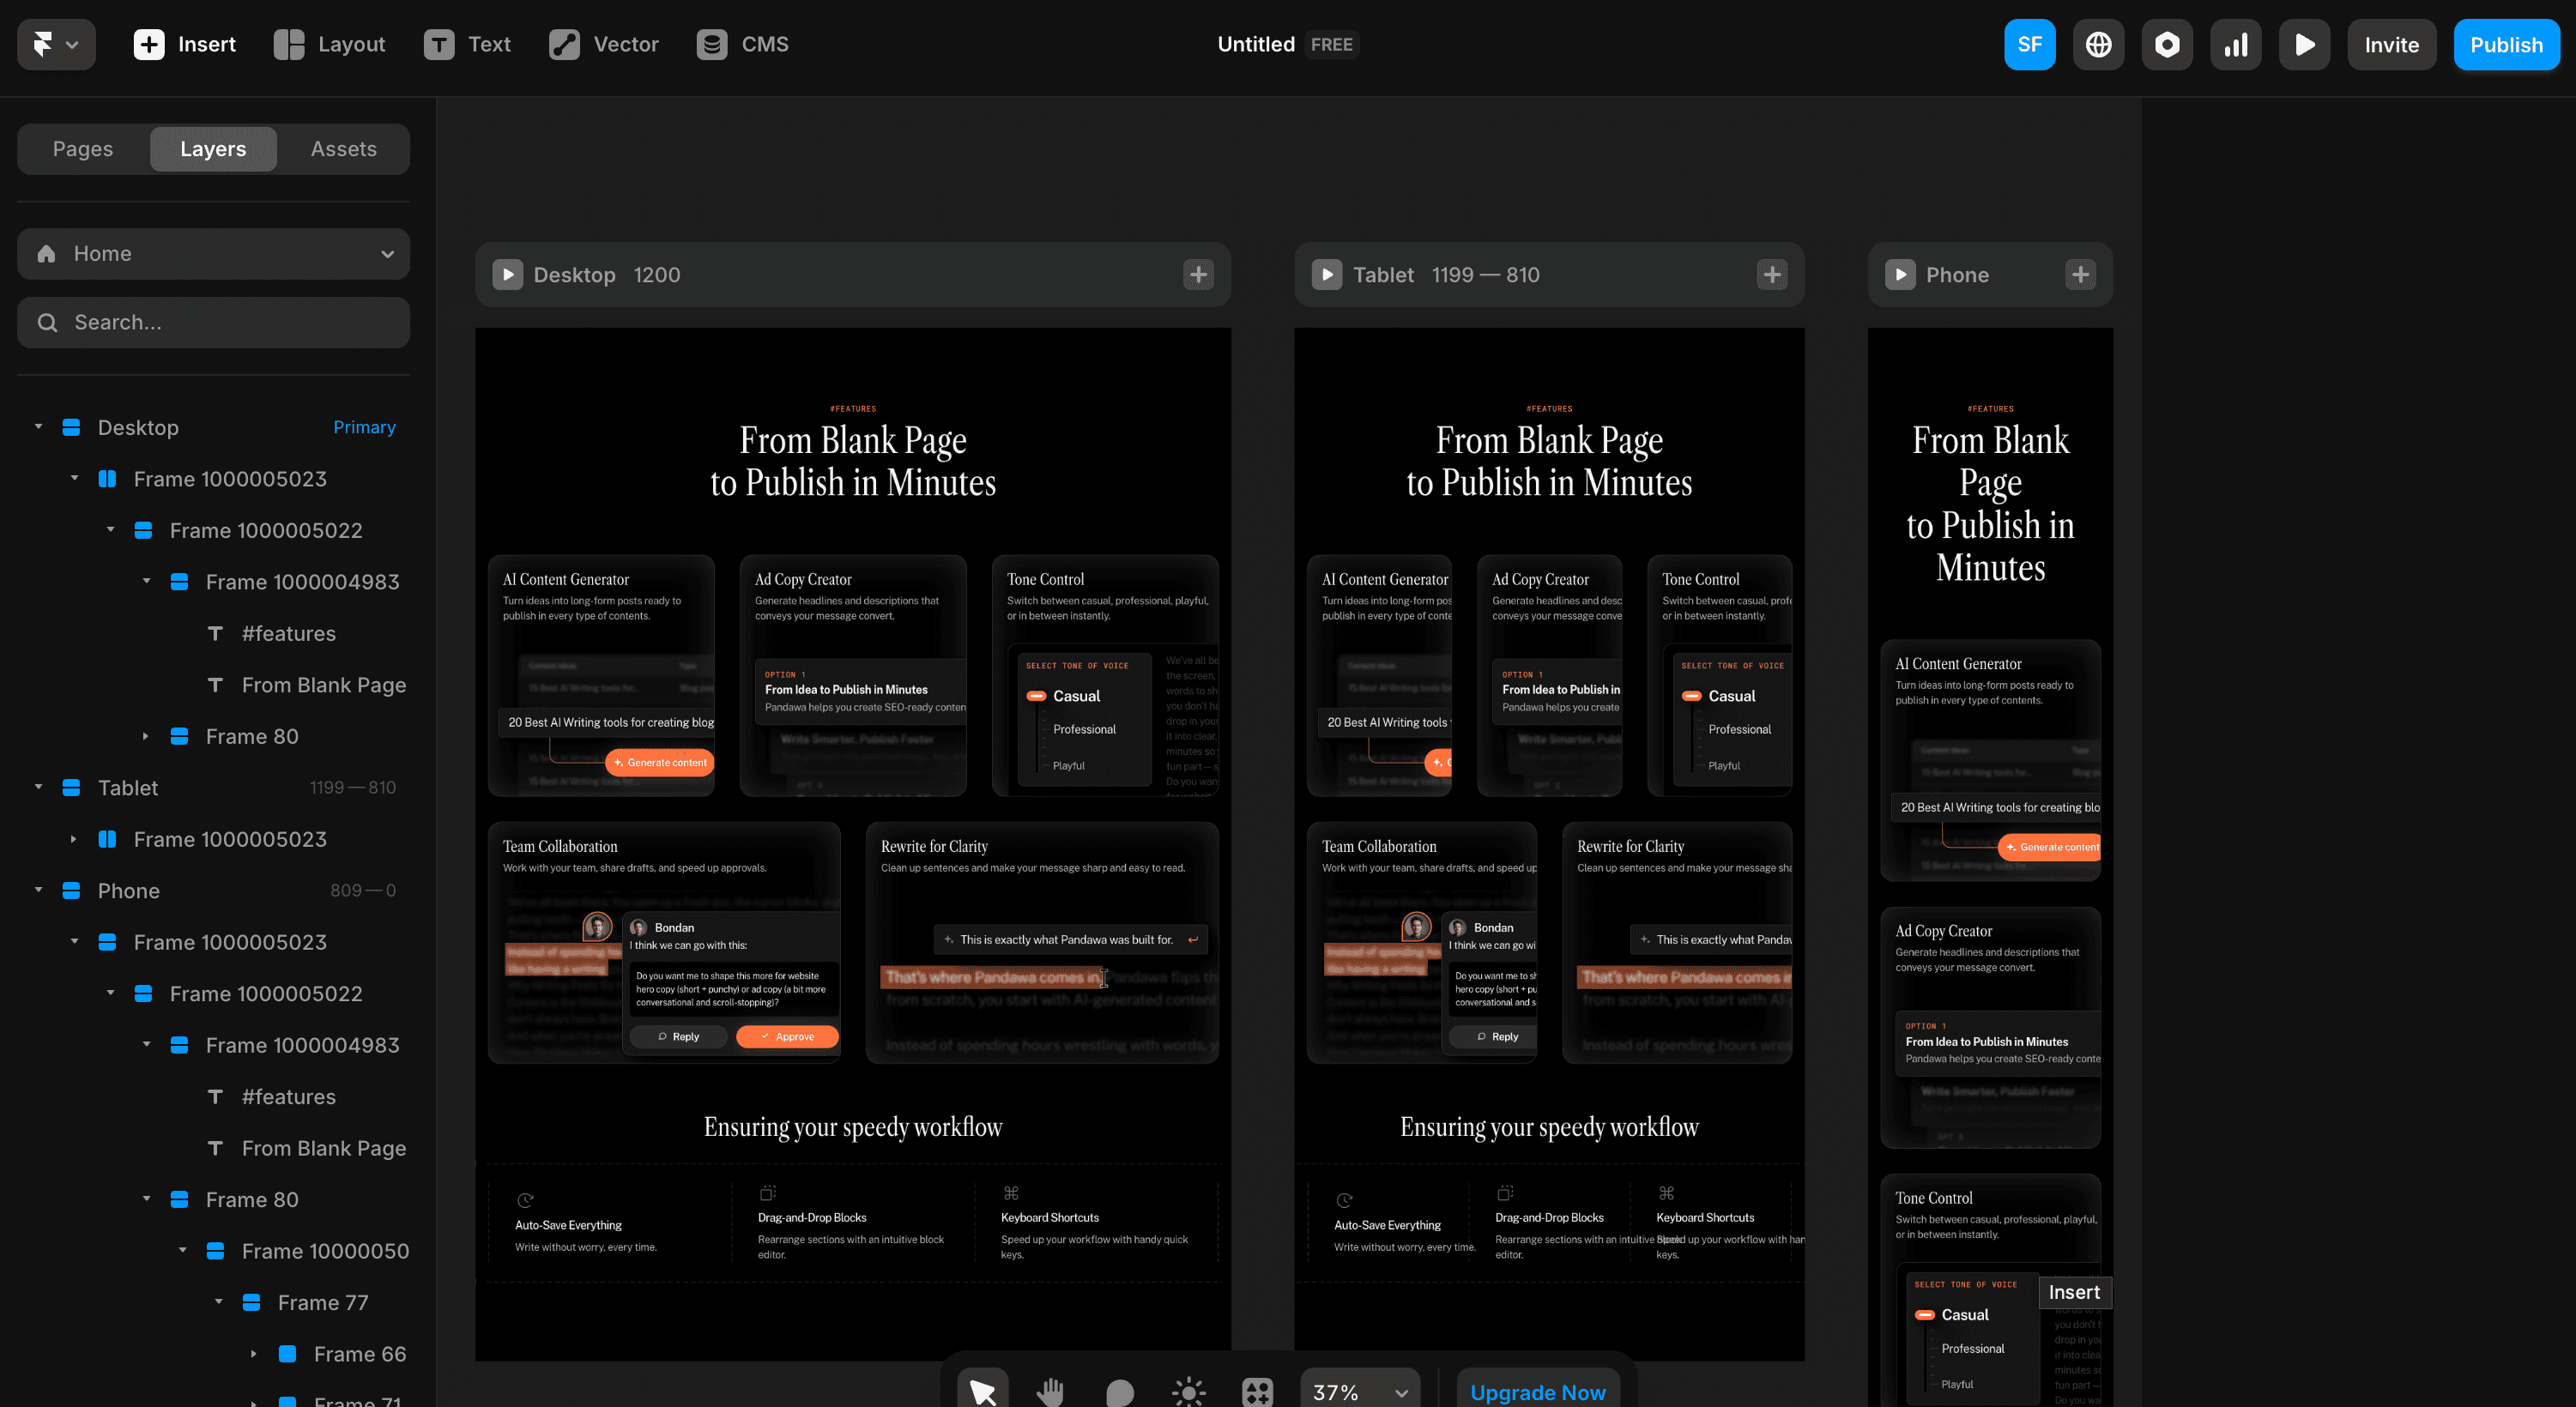
7. Make it responsive
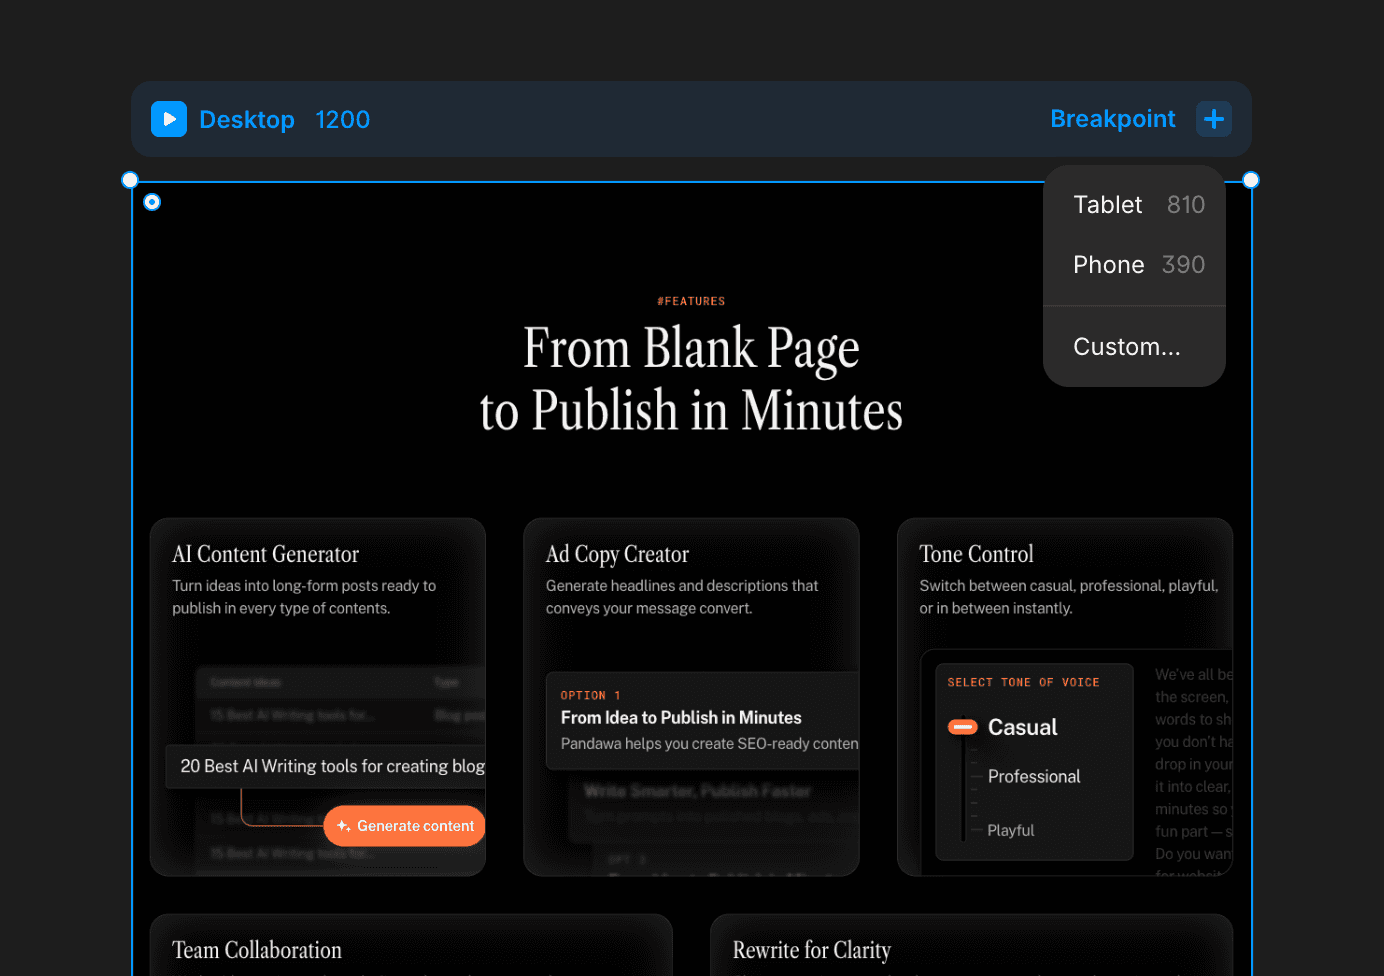
You can click the + on the breakpoint and select tablet and phone, it will automatically create new canvases for you to adjust for each breakpoint, like the screenshot I shared below.
If you use Auto Layout, the tablet and phone breakpoints will be adjusted automatically. If not, you might need to readjust them manually.
And that's it!
Common Figma to Framer Import Issues and How to Fix Them
This is honestly the part nobody talks about enough. The import works, but things rarely look perfect straight away. Here are the most common issues I've run into and how to fix them.
Fonts not showing up correctly
This usually happens when you're using a font in Figma that Framer doesn't have. The fix is simple: check your font list in Framer after importing and swap out any missing fonts for something from Google Fonts.
Elements overlapping or out of position
This happens almost every time when Auto Layout wasn't used in Figma. The elements import as absolute positioned layers. Just switch them to stack or grid layout in Framer and they'll snap back into place.
Images not importing
Sometimes images just show as placeholders. If that happens, re-export the images from Figma as PNG or JPG and upload them directly into Framer.
Text boxes are too wide or too narrow
Fixed widths from Figma carry over into Framer. Select the text elements and change the width from fixed to fill. That usually sorts it out right away.
The whole thing looks fine on desktop but breaks on mobile
This is a responsive issue. If Auto Layout wasn't used in Figma, you'll need to go into each breakpoint and manually adjust the layout. It takes a bit of time but it's not complicated once you get the hang of it.
Why Import from Figma to Framer Instead of Building from Scratch?
Good question, and honestly it depends on where you are in your project.
Importing from Figma makes sense when you already have a design that's been approved by a client or stakeholder and you just need to bring it to life. It saves you from having to recreate everything inside Framer and is especially useful when your design is very specific or custom.
Building from scratch in Framer makes more sense when you're starting fresh and don't have a Figma file yet. Framer is fast enough that designing and building at the same time is actually a pretty smooth workflow once you're used to it.
There's also a third option a lot of people overlook: starting with a Framer template. If your goal is to ship fast and the design doesn't need to be completely custom, a good template gets you 80% of the way there in a fraction of the time. You can always customize it to match your brand after.
Extra tips for smooth importing
Here are a few things I wish I knew the first time I tried this:
Start small. Try moving over just a section first to get the hang of it.
Name your layers. Clean layer names in Figma make things easier in Framer.
Adjust it. If stuff looks weird, just adjust. It's part of the process.
Use auto layout. It helps a lot, so you don't have to adjust much in Framer.
Conclusion
And there you go! That's how you import a Figma design into Framer using the Figma to Framer plugin.
But, if you'd rather skip all of this and jump straight into building a beautiful website without stressing much about adjusting it, feel free to check out our Framer templates. They are made for designers and agencies who want to skip the headaches and ship fast.
Sure, it's not magically perfect right out of the box. But with just a bit of cleanup, you'll have a live site that looks great on every screen.
If you're like me and love designing but not so much coding, this workflow is a total lifesaver.
And if you want to know how much it costs to build and run a Framer site after you've done the import, check out our Framer website cost guide to plan your budget.
Meet the author
Widya Bayu W
Widya Bayu W is a Framer expert and Co-founder of Velox Themes, he has 7+ years experience in design industry and now helping designers and agencies build website faster.
Ship Fast With Quality Framer Templates
No code required
Fast support
Ship faster


